This tutorial provides step-by-step instructions to install OpenCV 4 (with Python bindings) on your macOS machine.
OpenCV 4 was released on November 20th, 2018.
I originally wrote this blog post when the alpha version was released, and it has now been updated on November 30th, 2018 to support the official release.
OpenCV 4 comes with new features, particularly in the DNN module for deep learning.
To learn how to install OpenCV 4 on macOS, just keep reading.
Looking for the source code to this post?
Jump right to the downloads section.
Install OpenCV 4 on macOS
In this blog post we’re going to install OpenCV 4 on macOS. OpenCV 4 is packed with new features, many of which are deep-learning focused.
Note: If you landed on the wrong install tutorial (perhaps you want to install OpenCV on Ubuntu or your Raspberry Pi), then you should visit my OpenCV installation guides page. I post links to all my OpenCV install tutorials there.
First, we’ll install Xcode and set up Homebrew.
From there, we’ll establish Python virtual environments.
Then we’ll compile OpenCV 4 from source. Compiling from source allows us to have full control over the compile and build as well as to install the full OpenCV 4 build. I’ll cover alternative methods (pip and Homebrew) in future installation guides (neither of these methods can be covered until OpenCV 4 is officially released).
Finally, we’ll test out our OpenCV 4 install and get our feet wet with a real OpenCV project.
Let’s begin!
Step #1: Install Xcode
First we need to install Xcode.
To install Xcode, fire up the Apple App Store, find the Xcode app, and install. You’ll need to wait patiently as this figure indicates:
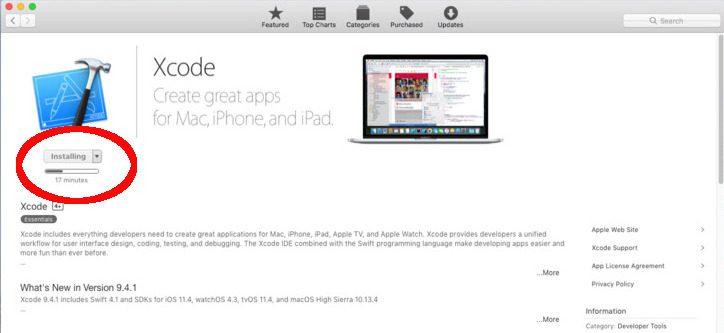
Figure 1: Xcode is a dependency for Homebrew and therefore OpenCV 4 on macOS. To install Xcode, launch the App Store, find Xcode, and run the installation.
After Xcode has installed we need to accept a license agreement. Launch a terminal and enter the following command:
|
1
|
$ sudo xcodebuild –license
|
To accept the license, simply scroll down and accept it.
Once you’ve accepted the license agreement, let’s install Apple Command Line Tools. This is required, so that you’ll have make , gcc , clang , etc. You can install the tools via:
|
1
|
$ sudo xcode–select —install
|
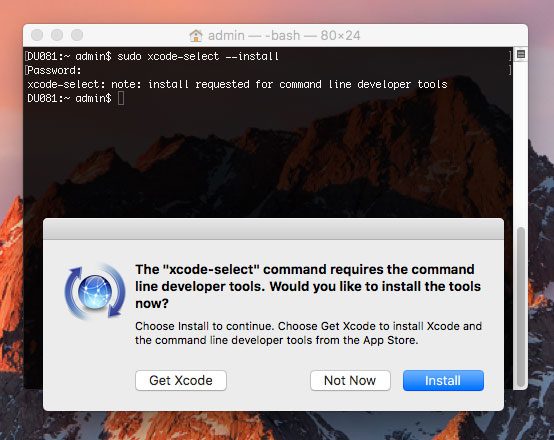
Figure 2: Installing Apple Command Line Tools on macOS.
Click the “Install” button and wait about 5 minutes for the installation to complete.
Step #2: Install Homebrew
For this step we’re going to install the Mac community package manager, Homebrew.
Homebrew runs on Ruby which is a popular programming language. When you’re ready, copy the entire command below to install Homebrew:
|
1
|
$ /usr/bin/ruby –e “$(curl -fsSL https://raw.githubusercontent.com/Homebrew/install/master/install)”
|
Note: Make sure you use the <=> button in the code block above to expand the code block before you copy and paste. If you don’t expand the code block you may end up copying pasting part of the command, which will ultimately end with an error installing Homebrew.
Homebrew commands are shortened to brew .
Let’s update the Homebrew definitions:
|
1
|
$ brew update
|
And now let’s edit our Mac’s bash profile. This script is run each time you launch a terminal. For simplicity, I suggest the nano text editor. If you’re more comfortable with vim or emacs, then go for it.
Edit your bash profile with nano using the following command:
|
1
|
$ nano ~/.bash_profile
|
Once you’re actively editing the file, append the following lines to the end to update yourPATH :
|
1
2
|
# Homebrew
export PATH=/usr/local/bin:$PATH
|
From there, save the profile. If you’re using nano, you’ll see the shortcut keys at the bottom of the window which demonstrate how to save (write) and exit.
Once you’re back in bash, source your bash profile:
|
1
|
$ source ~/.bash_profile
|
Step #3: Install OpenCV prerequisites using Homebrew
In this section we’ll ensure that Python 3.6 is installed. We’ll also install prerequisites for building OpenCV from source.
Install Python 3.6
It is extremely important to use Python 3.6. By default High Sierra and Mojave are coming with Python 3.7 now. It sounds good, but Python 3.7 is unsupported by Keras/TensorFlow (both are used often on this blog) and thus are not a good choice for OpenCV either.
These commands will install Python 3.6.5_1:
|
1
2
|
$ brew install https://raw.githubusercontent.com/Homebrew/homebrew–core/f2a764ef944b1080be64bd88dca9a1d80130c558/Formula/python.rb
$ brew switch python 3.6.5_1
|
Be sure to copy the entire command + URL.
Let’s verify:
|
1
2
3
4
5
|
$ python3
Python 3.6.5 (default, Jun 17 2018, 12:13:06)
[GCC 4.2.1 Compatible Apple LLVM 9.1.0 (clang–902.0.39.2)] on darwin
Type “help”, “copyright”, “credits” or “license” for more information.
>>>
|
Great! I can see that we have Python 3.6.5 installed now.
Let’s verify one more thing:
|
1
2
|
$ which python3
/usr/local/bin/python3
|
If you see /usr/local/bin/python3 you are using the Homebrew Python (which is what we desire). If you see /usr/bin/python3 then you are using the system Python and you likely need to fix your bash profile and/or source it.
Take the time now to verify you are using the Homebrew version of Python and not the system version.
Install other prerequisites
OpenCV requires a few prerequisites to be installed before we compile it. These packages are related to either (1) tools used to build and compile, (2) libraries used for image I/O operations (i.e., loading various image file formats from disk such as JPEG, PNG, TIFF, etc.) or (3) optimization libraries.
To install these prerequisites for OpenCV on macOS execute the following commands:
|
1
2
3
|
$ brew install cmake pkg–config
$ brew install jpeg libpng libtiff openexr
$ brew install eigen tbb
|
A tool you’ll learn to love is wget . All wget does is download files from the command line. We can use Homebrew to install wget:
|
1
|
$ brew install wget
|
Step #4: Install Python dependencies for OpenCV 4
We’re going to install the Python dependencies for OpenCV 4 in this step.
Taking advantage of the wget tool that we just installed, let’s download and install pip (a Python package manager):
|
1
2
|
$ wget https://bootstrap.pypa.io/get–pip.py
$ sudo python3 get–pip.py
|
Now that we have pip installed, we can install virtualenv and virtualenvwrapper, two tools for managing virtual environments. Python virtual environments are a best practice for Python development and I strongly urge you to take full advantage of them.
Each week, I receive countless emails and blog comments about problems that can be avoided with use of virtual environments. Virtual environments are different than virtual machines despite the similar name.
To learn about virtual environments, I suggest you give this article a read.
Let’s install virtualenv and virtualenvwrapper , then do a bit of cleanup:
|
1
2
|
$ sudo pip3 install virtualenv virtualenvwrapper
$ sudo rm –rf ~/get–pip.py ~/.cache/pip
|
From there, we need to edit our bash profile again so that these two tools work properly.
Fire up nano (or your preferred text editor):
|
1
|
$ nano ~/.bash_profile
|
And then add these lines to the end of the file:
|
1
2
3
4
|
# virtualenv and virtualenvwrapper
export WORKON_HOME=$HOME/.virtualenvs
export VIRTUALENVWRAPPER_PYTHON=/usr/local/bin/python3
source /usr/local/bin/virtualenvwrapper.sh
|
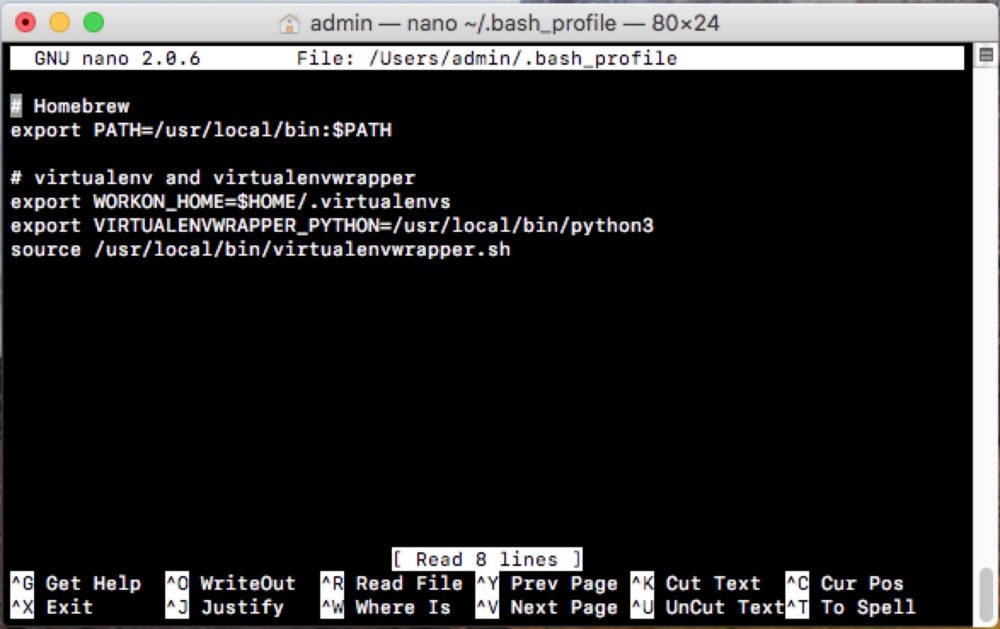
Figure 3: Using the nano text editor to edit the ~/.bash_profile prior to installing OpenCV 4 for macOS.
Pro-tip: You can use bash commands to append to the file without opening an editor:
|
1
2
3
4
|
$ echo –e “\n# virtualenv and virtualenvwrapper” >> ~/.bash_profile
$ echo “export WORKON_HOME=$HOME/.virtualenvs” >> ~/.bash_profile
$ echo “export VIRTUALENVWRAPPER_PYTHON=/usr/local/bin/python3” >> ~/.bash_profile
$ echo “source /usr/local/bin/virtualenvwrapper.sh” >> ~/.bash_profile
|
Then source the file:
|
1
|
$ source ~/.bash_profile
|
You’ll see several lines printed in your terminal indicating that virtualenvwrapper is setup.
The virtualenvwrapper tool provides us a number of terminal commands:
- mkvirtualenv <env_name> <options> : Used to “make a virtual environment”
- rmvirtualenv <env_name> : Destroys a virtual environment
- workon <env_name> : Activates a virtual environment
- deactivate : Deactivates the current virtual environment
- You’ll want to read the docs for more information.
Let’s take advantage of the first command to create a Python virtual environment for OpenCV:
|
1
2
3
4
5
6
7
8
9
10
11
12
|
$ mkvirtualenv cv –p python3
Running virtualenv with interpreter /usr/local/bin/python3
Using base prefix ‘/usr/local/Cellar/python/3.6.5_1/Frameworks/Python.framework/Versions/3.6’
New python executable in /Users/admin/.virtualenvs/cv/bin/python3.6
Also creating executable in /Users/admin/.virtualenvs/cv/bin/python
Installing setuptools, pip, wheel...
done.
virtualenvwrapper.user_scripts creating /Users/admin/.virtualenvs/cv/bin/predeactivate
virtualenvwrapper.user_scripts creating /Users/admin/.virtualenvs/cv/bin/postdeactivate
virtualenvwrapper.user_scripts creating /Users/admin/.virtualenvs/cv/bin/preactivate
virtualenvwrapper.user_scripts creating /Users/admin/.virtualenvs/cv/bin/postactivate
virtualenvwrapper.user_scripts creating /Users/admin/.virtualenvs/cv/bin/get_env_details
|
Notice that cv is the name of our environment and that I am creating a Python 3 (controlled by the –p python3 switch) environment.
Important: Take note in the output that Python 3.6 is being utilized for the environment as well (highlighted).
You may name your environment differently if you’d like. I actually like to name my environments like so:
- py3cv4
- py3cv3
- py2cv2
- etc.
Here my py3cv4 virtual environment can be used for Python 3 + OpenCV 4. My py3cv3 virtual environment is used for Python 3 and OpenCV 3. And my py2cv2 environment can be used to test legacy Python 2.7 + OpenCV 2.4 code. These virtual environment names are easy to remember and allow me to switch between OpenCV + Python versions (nearly) seamlessly.
Next, let’s install NumPy while we’re inside the environment.
Chances are, the environment is already active (indicated by (cv) preceding your bash prompt). Just in case, let’s workon (activate) the environment:
|
1
|
$ workon cv
|
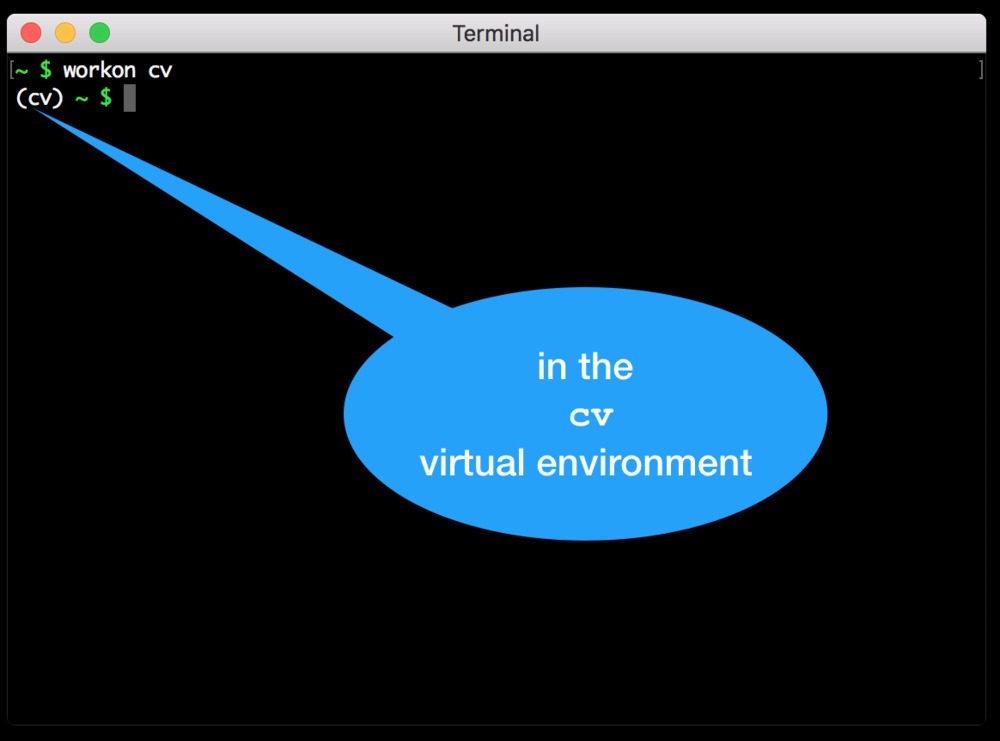
Figure 4: We are “in” the cv virtual environment as is denoted by (cv) before the bash prompt. This is necessary prior to installing packages and compiling OpenCV 4.
Each time you wish to use the environment or install packages into it you should use theworkon command.
Now that our environment is activated, we can install NumPy:
|
1
|
$ pip install numpy
|
Step #5: Compile OpenCV 4 for macOS
Compiling from source gives you the most control over your build as opposed to package managers such as pip, Homebrew, and Anaconda.
Package managers are convenient for sure and I’ll cover them in a future installation tutorial, I just want to give you fair warning — while they appear easy on the surface, you won’t be able to get the latest revision of OpenCV and in some cases it won’t work well with virtual environments. You also might be missing features.
I still compile from source all the time and you should definitely learn how if you’re serious about working with OpenCV.
Download OpenCV 4
Let’s download OpenCV.
First, navigate to our home folder and download both opencv and opencv_contrib. The contrib repo contains extra modules and functions which we frequently use here on the PyImageSearch blog. You should be installing the OpenCV library with the additional contrib modules as well.
When you’re ready, just follow along to download both the opencv and opencv_contrib code:
|
1
2
3
|
$ cd ~
$ wget –O opencv.zip https://github.com/opencv/opencv/archive/4.0.0.zip
$ wget –O opencv_contrib.zip https://github.com/opencv/opencv_contrib/archive/4.0.0.zip
|
Update 2018-11-30: OpenCV 4.0.0 is officially released and I have updated the download URLs above.
From there, let’s unzip the archives:
|
1
2
|
$ unzip opencv.zip
$ unzip opencv_contrib.zip
|
I also like to rename the directories:
|
1
2
|
$ mv opencv–4.0.0 opencv
$ mv opencv_contrib–4.0.0 opencv_contrib
|
If you skip renaming the directories, don’t forget to update the CMake paths next.
Now that opencv and opencv_contrib are downloaded and ready to go, let’s set up our environment.
Compile OpenCV4 from source
Now that opencv and opencv_contrib are downloaded and ready to go, let’s employ CMake to setup our compile and Make to perform the compilation.
Navigate back to your OpenCV repo and create + enter a build directory:
|
1
2
3
|
$ cd ~/opencv
$ mkdir build
$ cd build
|
Now we’re ready for CMake. Be sure to use the workon command before executing thecmake command as shown:
|
1
2
3
4
5
6
7
8
9
10
11
12
13
|
$ workon cv
$ cmake –D CMAKE_BUILD_TYPE=RELEASE \
–D CMAKE_INSTALL_PREFIX=/usr/local \
–D OPENCV_EXTRA_MODULES_PATH=~/opencv_contrib/modules \
–D PYTHON3_LIBRARY=`python –c ‘import subprocess ; import sys ; s = subprocess.check_output(“python-config –configdir”, shell=True).decode(“utf-8”).strip() ; (M, m) = sys.version_info[:2] ; print(“{}/libpython{}.{}.dylib”.format(s, M, m))’` \
–D PYTHON3_INCLUDE_DIR=`python –c ‘import distutils.sysconfig as s; print(s.get_python_inc())’` \
–D PYTHON3_EXECUTABLE=$VIRTUAL_ENV/bin/python \
–D BUILD_opencv_python2=OFF \
–D BUILD_opencv_python3=ON \
–D INSTALL_PYTHON_EXAMPLES=ON \
–D INSTALL_C_EXAMPLES=OFF \
–D OPENCV_ENABLE_NONFREE=ON \
–D BUILD_EXAMPLES=ON ..
|
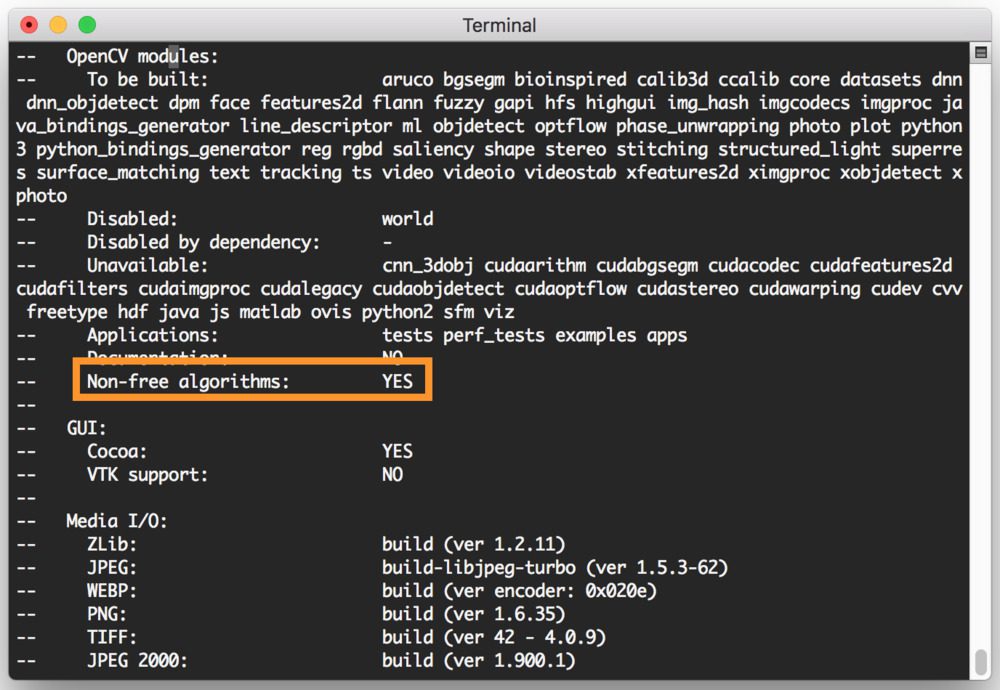
Update 2018-11-30: I added a CMake compile flag to enable nonfree algorithms (OPENCV_ENABLE_NONFREE=ON ). This is required for OpenCV 4 if you want access to patented algorithms for educational purposes.
Note: For the above CMake command, I spent considerable time creating, testing, and refactoring it. It is effectively self-configuring with no work required on your part. I’m confident that it will save you time and frustration if you use it exactly as it appears. Make sure you click the “<=>” button in the toolbar of the code block above to expand the code block. This will enable you to copy and paste the entire command (it’s pretty lengthy).
Once CMake has finished, scroll up (ever so slightly) until you see the following information in your terminal:
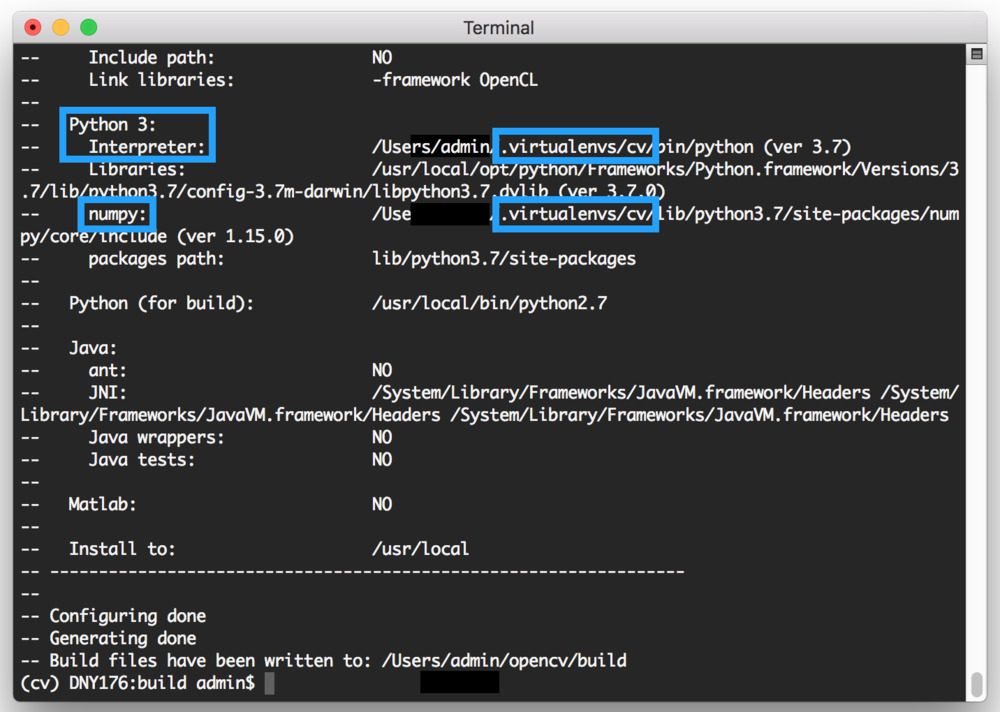
Figure 5: Inspecting CMake output while installing OpenCV 4 on macOS is important. Be sure that your cv virtual environment is being used for Python and NumPy.
Your output should look very similar to mine. What you’re looking for is to ensure that your Python 3 interpreter and NumPy in the virtual environment will both be used. If you don’t see this, then you likely executed CMake without being “in” the cv virtual environment (or whatever you named your Python virtual environment). If that’s the case, no worries — just delete the build directory, activate the virtual environment with the workon command, and re-run CMake.
Next, scroll up a little further to check that your output matches mine where I’ve highlighted:
Provided that your CMake output is good to go you can kick off the compilation via:
|
1
|
$ make –j4
|
Note: The -j4 argument is optional and will instruct make to take advantage of 4 CPU cores. You can adjust the numerical value or leave the argument off completely. It doesn’t happen often, but sometimes race conditions may prevent the compile from finishing — at which point you should execute make without the flag.
Take a break while the compilation continues, but don’t forget to come back and create symbolic links.
When make is finished, you should see this:
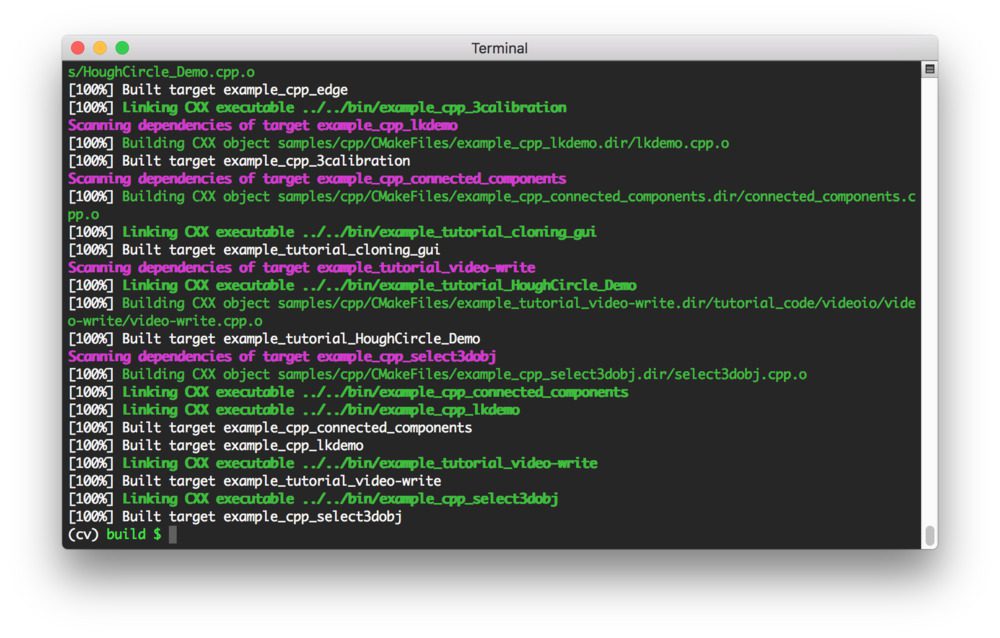
Figure 6: Compiling OpenCV 4 on macOS has reached 100%. We’re now ready to link OpenCV 4 into our cvenvironment.
If you’ve reached 100%, then there is one additional command to install OpenCV 4 prior to Step #5:
|
1
|
$ sudo make install
|
Step #6: Sym-link OpenCV 4 on macOS to your virtual environment site-packages
Now let’s create what is called a “symbolic link”. We need a link from our cv virtual environment site–packages to our system site–packages where OpenCV was installed. Effectively, OpenCV will then be “linked” into the virtual environment allowing you to import it into Python scripts as well as the command line interpreter.
First, let’s check the location of the OpenCV bindings — we’ll need the exact location in order to make the link. I encourage you to use tab completion to end up in the right directory rather than copy/pasting the command:
|
1
2
|
$ ls /usr/local/python
cv2/ setup.py
|
Using the output from that command, we’ll sym-link in OpenCV bindings into the site-packages directory of the cv Python virtual environment:
|
1
2
|
$ cd ~/.virtualenvs/cv/lib/python3.6
$ ln –s /usr/local/python/cv2 cv2
|
Important considerations:
- We are creating a symbolic link from the cv virtual environment Python site–packages cv2/ to the global /usr/local/python/cv2 . Take the time to understand how this works — you might read this article.
- Be sure your paths are correct. I recommend tab-completion rather than copy/paste.
I can’t stress this point enough: The cv Python virtual environment is entirely independent and sequestered from the default Python version on your system. Any Python packages in the global directories will not be available to the cv virtual environment. Similarly, any Python packages installed in site–packages of cv will not be available to the global install of Python. Keep this in mind when you’re working in your Python virtual environment and it will help avoid a lot of confusion and headaches.
Install imutils
I also recommend that you install my very own imutils package if you’ll be frequently visiting my blog as we use it quite often:
|
1
2
|
$ workon cv
$ pip install imutils
|
Step #7: Test your macOS + OpenCV 3 install
It is always important to test your OpenCV install to make sure the proper links have been made.
I like to fire up a Python shell in the virtual environment and check that it imports without error and that the version matches my intention:
|
1
2
3
4
5
6
|
$ workon cv
$ python
>>> import cv2
>>> cv2.__version__
‘4.0.0’
>>> exit()
|
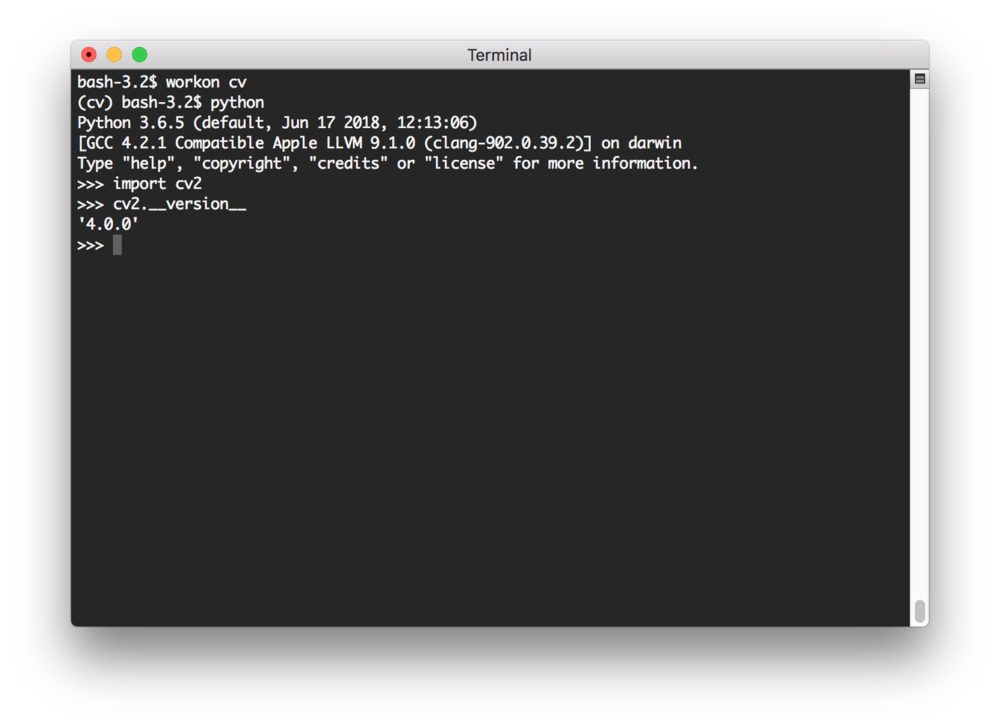
Figure 7: To test that OpenCV 4 is installed on macOS, fire up Python in your virtual environment and execute cv2.__version__ after importing cv2.
Provided you see no errors and OpenCV 4 is installed, you’re good to go!
Run your first example with your fresh install of OpenCV 4!
If you’re breaking into the field of computer vision with OpenCV, my guess is that you want to run something cool with OpenCV.
Let’s start by building a simple “document scanner” with OpenCV.
I’m not going to review all the code here — you should check out the original post if you’re interested or when you have more time.
To get started, simply scroll to the “Downloads” and grab the source code + images.
From there just enter the following commands to prepare:
|
1
2
3
4
5
6
7
8
9
10
11
12
13
14
|
$ workon cv
$ unzip document–scanner.zip
$ cd document–scanner
$ tree
.
├── images
│ ├── page.jpg
│ └── receipt.jpg
├── pyimagesearch
│ ├── __init__.py
│ └── transform.py
└── scan.py
2 directories, 5 files
|
As you can see, there are two sample images, a pyimagesearch module (which needs to be downloaded via the “Downloads” section — it is not pip-installable), and the scan script.
We’ll need one additional library added to our cv environment: Scikit-image. To install it, simply use pip. While you’re at it, if you didn’t install imutils earlier, go ahead and install it as well:
|
1
|
$ pip install scikit–image imutils
|
From there you can execute the following command to give OpenCV 4 a workout:
|
1
2
3
4
|
$ python scan.py —image images/receipt.jpg
STEP 1: Edge Detection
STEP 2: Find contours of paper
STEP 3: Apply perspective transform
|
At the end of each step, you’ll need to press a key — with the window in focus on your desktop.
Sometimes OpenCV’s hides windows under one another, so be sure to drag the OpenCV image windows around to see what is available.
Here’s a screenshot of the last step of document scanning:
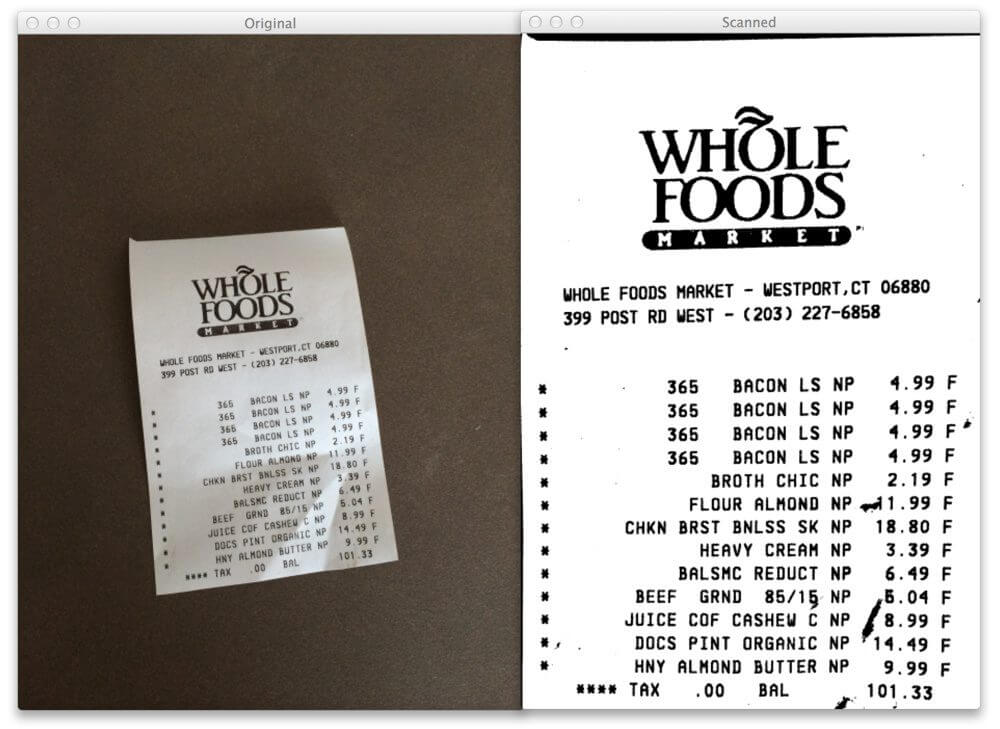
Figure 8: Applying step 3 of our document scanner, perspective transform. The original image is on the left and the scanned image on the right.
That was fun!
Learn how the code works by reading the original blog post.
If you’d like to build additional projects with OpenCV 4, just continue to follow my blog!
Troubleshooting and FAQ
In this section, I address some common questions and problems that readers encounter when installing OpenCV 4 on macOS.
Q. Can I run OpenCV 4 with Python 2.7 on macOS?
A. I suggest you stick with Python 3, but if you’re working on legacy projects, I understand that you might want to use Python 2.7. Here is what you need to do:
- Install Python 2.7 via Homebrew using brew install python2
- You should pip with 2.7 in Step #3: sudo python get–pip.py and sudo pip installvirtualenv virtualenvwrapper
- In Step #3, simply create a Python 2.7 environment: mkvirtualenv cv –p python2.7
- Verify CMake output is using your Python 2.7 virtual environment interpreter in Step #4, Figure 5.
Q. Do I need to run brew install Python? Python seems to already be installed on my Mac!
A. Yes. Python is installed, but you’ll want Brew’s updated Python and plus Brew will put Python in /usr/local/bin which is separate from your system Python.
Q. When I execute mkvirtualenv or workon , I encounter a “command not found error”.
A. There a number of reasons why you would be seeing this error message, all of come from to Step #3:
- First, make sure you have installed virtualenv and virtualenvwrapper properly using the pip package manager. Verify by running pip freeze , and ensure that you see both virtualenv and virtualenvwrapper in the list of installed packages.
- Your ~/.bash_profile file may have mistakes. View the contents of your~/.bash_profile file to see the proper export and source commands are present (check Step #3 for the commands that should be appended to ~/.bash_profile ).
- You may have forgotten to source your ~/.bash_profile . Make sure you run source~/.bash_profile after editing it to ensure you have access to the mkvirtualenv andworkon commands.
Q. When I open a new terminal, logout, or reboot my macOS system, I cannot execute themkvirtualenv or workon commands.
A. See #2 from the previous question.
Q. I reached the end, however when I run Python in my terminal and try to import cv2 , I encounter an error. What next?
A. Unfortunately this situation is hard to diagnose without being on your system. Many things could have gone wrong. The most likely point of failure is the symbolic linking step. I suggest you do the following to check the symbolic link:
|
1
2
3
|
$ cd ~/.virtualenvs/cv/lib/python3.6/site–packages
$ ls –al cv2*
lrwxr–xr–x 1 admin _developer 21 Nov 30 11:31 cv2 -> /usr/local/python/cv2
|
What you’re looking for is the -> arrow and that it points to a valid path on your system. If the path is invalid, then you have a sym-link issue that you need to fix. You can correct it by deleting the symlink and trying Step #5 again.
Q. Why do I get a “NONFREE” error when trying to use a patented algorithm such as SURF?
A. With OpenCV 4 there is a new requirement for compiling. Please refer to Step #5 where this is addressed for OpenCV 4 with a CMake argument.
Q. Can I install OpenCV with Brew instead of compiling from source?
A. Beware! The answer is yes, but it if you plan on using virtual environments you’ll still need symbolic links. I’ll do another writeup on the Homebrew method in the future.
Q. Can I install OpenCV 4 with pip into my virtual environment?
A. Currently you can’t install OpenCV 4 with pip. But you can install OpenCV 3.4.3. See how to pip install opencv.
Summary
Today we installed OpenCV4 with Python bindings on your macOS machine.
I’ll be back with future installation tutorials for OpenCV 4 (including one for the Raspberry Pi). If you’re looking for my other, already published OpenCV install tutorials, be sure to refer to this page.
Stay tuned!
To download the source code for today’s tutorial, just enter your email in the form below.

